

Overview
Rambling
A while back, someone mentioned it might be fun to document the PowerShell-module-writing-process. This has been done before, but I figure it would be fun to post my own process, from initial idea through publication on the official PowerShellGallery.com site.
I recently discussed the August Scripting Games puzzle on PowerShell.org, which involved querying a web API. It turns out this is a very common need, and many of the modules we write abstract out these APIs into handy PowerShell functions and modules.
We’re going to make the assumption you know what a module is, and that you have some experience writing PowerShell functions. If not, be sure to spend some time learning PowerShell before continuing here!
This post will cover my typical formula for writing a module, using the Stack Exchange API as an example. Feel free to browse the PSStackExchange code on your own.
Why Modules?
Advanced functions will take you far with PowerShell. If you aren’t writing functions today, be sure to start encapsulating your code in these re-usable tools. But… they have their limits. Here are a few reasons you might bundle your advanced functions in a module:
- Simplify code organization
- Group related functions together
- Share state between functions, but not with the user
- Re-use “helper functions” that you don’t want exposed to the user
- Improve discoverability:
Find-Module MyModuleorGet-Command -Module MyModule - Simplify distribution:
Install-Module MyModule
In our example, we will organize a set of Stack Exchange functions into one module.
This Seems Complicated!
Doing this from scratch might take you a little time. Thankfully, once you write a module or two, you can quickly get started by copying it and tweaking a few files. Don’t be scared off by the length of this post; writing your own modules is well worth spending a few minutes to pick up the basics!
The Ingredients
There are many ways to create a module, from slapping a .psm1 extension onto a file, to compiling a fully fledged binary module from C#. We’ll take a common middle ground here, and use the following ingredients:
- A Module Manifest. This is a .psd1 file that describes your module. PSStackExchange.psd1
- A Root Module. In our case, a script module .psm1 file. This is just PowerShell code to run when importing the module. PSStackExchange.psm1
- Exported (Public) Functions. These are the advanced functions an end user can run from our module. For example, Get-SEQuestion.ps1 or Get-SEObject.ps1
- Private Functions. These are optional “helper functions” that we want to use in our exported functions, that the end user shouldn’t see. For example, Add-ObjectDetail.ps1 or Join-Parts.ps1
- Formats. These are optional format.ps1xml formats to help decorate your output, often specified in the module manifest ‘FormatsToProcess’. PSStackExchange.Format.ps1xml
- Readme. If you’re using GitHub or another common code repository, the Readme.md is a handy front page for your project, written using simple Markdown rather than HTML
- AppVeyor config. If you’re using a supported version control solution, AppVeyor enables simple and free continuous integration and delivery for open source projects. AppVeyor.yml
We have our ingredients, let’s look at a recipe for a module!
The Recipe
We’re going to do this in a few quick steps:
- Create a GitHub repository
- Create the module and scaffolding around it
- Hook up AppVeyor and publish the module
This might take a few minutes the first time you run through it, but you can borrow and tweak this same scaffolding for each module you write. In fact, you might find or write helper PowerShell modules and tools that simplify this process.
Let’s get to work!
Following the Recipe
There’s no real order to this; depending on what you do or don’t incorporate, don’t feel like you need to follow this to the letter.
Create a GitHub Repository.
This should be pretty straightforward. If you haven’t used GitHub before, the following might help:
- GitHub for PowerShell Projects
- PowerShell.org TechSession: A Crash Course in Version Control and Git and presentation materials
All we need to do is:
- Create an account on GitHub, download GitHub for Windows
- Create a new repository (We’ll call it PSStackExchange, and pick the MIT license)
- Clone PSStackExchange using GitHub for Windows
Let’s move on to the most important bit, the module itself.
Create the Module and Scaffolding Around It
Here’s how I typically organize my modules. We’ll use PSStackExchange as an example, substitute this out for your own module!
- PSStackExchange\
- en-US\ (or locales of choice)
- about_PSStackExchange.help.txt
- Private
- Join-Parts.ps1
- Get-SEData.ps1
- …
- Public
- Get-SEObject.ps1
- Search-SEQuestion.ps1
- …
- lib\ (Not used in this module)
- Some.Library.dll
- bin\ (Not used in this module)
- SomeDependency.exe
- PSStackExchange.Format.ps1xml
- PSStackExchange.psd1
- PSStackExchange.psm1
- en-US\ (or locales of choice)
If we’re going to be adding our project to GitHub or a similar code repository, we add a little more scaffolding:
- Repository Root
- PSStackExchange\ (Module folder described above)
- Tests
- PSStackExchange.Tests.ps1
- Appveyor.Pester.ps1
- README.md
- AppVeyor.yml
I ran through the following code to get started. Typically I’ll just copy the scaffolding from another module, create a new GUID in the psd1, and tweak other module specific references.
In our case, we have a few Stack Exchange advanced functions that hopefully follow a few best practices, some private helper functions that we don’t want the user to see, and a few other files to cover testing and usability.
In PSStackExchange.psm1 we load our public and private functions. If a module is a work-in-progress, I’ll usually export $Public.Basename to avoid hard coding functions to export in the psd1. Once a module is released, I try to add the public functions to the psd1.
If you’re writing a module, you should consider writing Pester tests for it. It’s quite comforting to have a suite of tests that run automatically after each change you push, rather than assuming the code you write was correct, or attempting to manually test your code after each change. Give it a shot! We include a few superficial tests in PSStackExchange.Tests.ps1.
Lastly, we include some usability features. We add an about_PSStackExchange help topic, we decorate our output with the PSStackExchange.Format.ps1xml file, and we add some notes on how to install and use the module in the README.md.
We’re good to go! Let’s look at how we can publish this module for others to use and improve.
Hook up AppVeyor and Publish the Module
The content of our module is ready to publish. Before we publish this, we’ll enable continuous integration with some handy automated testing through AppVeyor.
First, we set up our project in AppVeyor by adding appveyor.yml to the repository, and adding the GitHub project to our AppVeyor account. We abstract out the calls to Pester in AppVeyor.Pester.ps1, using some ideas from here.
Next, we push the changes we’ve made on our computer up to GitHub. Our code is now published, and AppVeyor will start running a build.
Lastly, we want to publish our module in the PowerShell Gallery, giving end users with PowerShell 5 a simple way to find and install your module. We could hook this up to automatically run in AppVeyor, but that’s a topic for later.
- Sign on to PowerShellGallery.com with your Microsoft account
- Get your API key (find it here)
- Publish your module!
Our module is now live on PowerShell Gallery!
How I Write Modules, Summarized
Whew! That was a long post. Thankfully, most of this stuff can be re-used in each module you write. Let’s review the steps:
- Create a GitHub repository
- Create the module and scaffolding around it
- Hook up AppVeyor and publish the module
The first and last step take a minute or two each. The module and scaffolding around it can be copied and tweaked, which should only take a few minutes. Most of your time will be spent writing the advanced functions for the module.
PSStackExchange
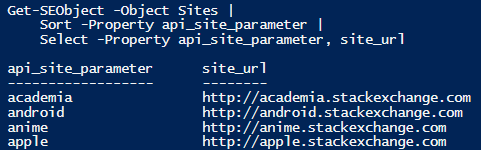
The module is published and ready to use! I’m on another computer with PowerShell 5, I can get up and running with a few lines of code:
Here’s some output from the examples:

Wrapping Up
That’s about it! If you aren’t writing modules already, you should definitely consider it. Looking for further reading? Here are a few references that might come in handy:
- Module Design Rules - This is from the 2014 PowerShell Summit, thanks to Kirk Freiheit
- Further Down the Rabbit Hole: PowerShell Modules and Encapsulation
- How to Write a Module Manifest
- Windows PowerShell Modules
- about_Modules
- Building PowerShell Functions - Best Practices - Shameless plug. Includes a number of references.
- Learn PowerShell Toolmaking in a Month of Lunches
- Free eBook on PowerShell Advanced Functions
- The PowerShell Best Practices and Style Guide
- Monad Manifesto - This gives a nice overview of the vision and goals set out for PowerShell. If you’re writing modules for public consumption, consider reading this, to avoid publishing something as awful as Citrix’ PVS “PowerShell” snapin.
Side Note for Vendors
Writing PSStackExchange reminded me how important it is for vendors of enterprise products to provide PowerShell modules that wrap their product’s API. Despite a nice API and decent documentation, writing a feature-poor PowerShell module for this was just as painful as wrapping the Infoblox API.
Vendors: If your competition provides a PowerShell module and you do not, there’s a good chance I’ll push for your competitor’s product. This is a major value-add if you do it right and follow PowerShell conventions.
Cheers!
EDIT July 2016: Updated links to PSStackExchange to link to a specific point in time. The current version of this project may see updates to illustrate things like PSDeploy.