

Overview
Rambling
Rewind to January 2014. I had roughly six months to wrap up a graduate program, and didn’t have time for the disasters that can occur if you don’t use version control. GitHub fit the bill, so I joined up. Nearly a year went by before I received my first pull requests and started playing with Pester and AppVeyor (thanks to Sergei!). Once I started collaborating with others, I realized how helpful and beneficial this ecosystem can be.
Today, I’m hoping to share some of the lessons learned, and provide yet another “getting started with GitHub,” walk through, focusing on (but not limited to) some of the benefits to your PowerShell projects.
This post will walk through a general workflow for using GitHub. For simplicity’s sake, we will use GitHub.com and the GitHub for Windows client. As a PowerShell user, I hope you take a moment to dive into Git and the command line workflow, but there’s no shame in sticking with the client, or alternatives.
Prerequisites
- Sign up for a GitHub.com account. The free plan is pre-selected. Example.
- Download GitHub for Windows.
- Verify your e-mail from the confirmation e-mail you receive.
That’s it, you’re on GitHub!
Configure the GitHub Client
This is almost as easy as signing up.
- Open the client for the first time, authenticate, and configure the user name and e-mail for your commits.
- You can keep your e-mail private using username@users.noreply.github.com.

That’s it, we have GitHub installed, now it’s time to start using it!
GitHub took care of a few things behind the scenes, including setting up an SSH key and adding it to your account. You can see these on your account settings page.
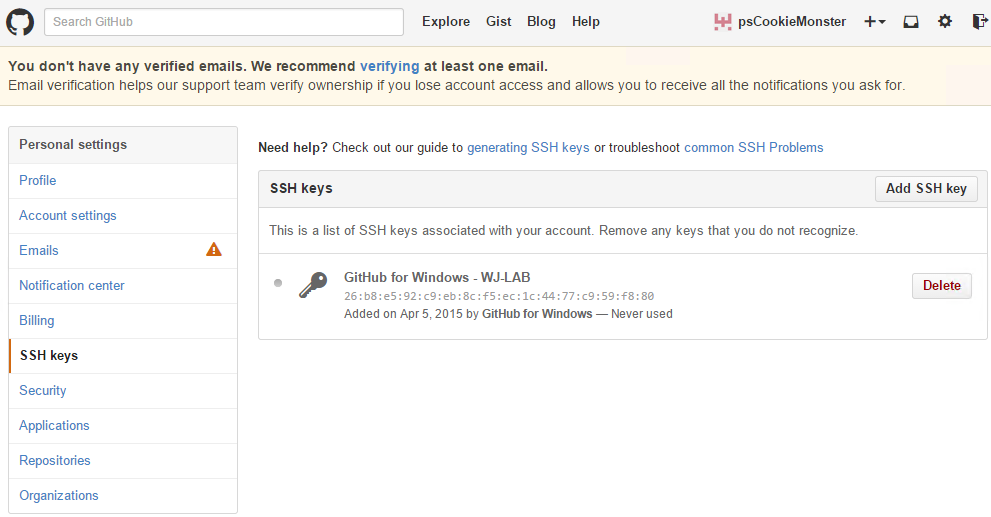
Create a Repository
Let’s create a repository. We’ll call it PowerShell.

There’s no hard and fast rule on what goes in here. You might have a repository with a smorgasbord of your favorite functions, another for one specific function, and one for a module. When you get more involved and collaborate with others, sticking to more targeted repositories will simplify things.
You don’t need to create a readme.md, but these are a handy way to build a ‘front page’ for your repository. These use markdown, which sacrifices flexibility for a simple to use syntax. You’re actually reading a website generated from markdown right now.
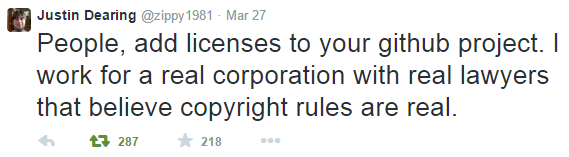
We chose the MIT license. I base my licensing decisions on the fact that I grew up near Boston. Really though, don’t ignore this. GitHub makes choosing a license incredibly straightforward. Microsoft employees might not contribute to a GPL project. Some folks might not be able to use your code if you have no license:
Do Stuff
That’s it! Now we can do stuff.
Clone the Repository
Let’s clone the PowerShell repository we created and edit it on our desktop:
Commit and Push
Make some changes. Add a file, change a file, remove a file, do whatever comes to mind. At some point, you want to commit your changes, and basically tell Git “hey, take a quick snapshot of this project.”
The GitHub client sees that I have changes to my files; I describe what I changed in the commit message, and hit commit. I can browse through the specific files, and the GitHub client will highlight new lines in green, removed lines in red.
When we make a commit to a cloned repository, it doesn’t change the actual repository on GitHub. We need to push our changes up to GitHub. Notice that we have ‘Unsynced Changes’, and the Sync button has a badge to tell us we have one commit to push:
If I made changes on another computer or on GitHub.com directly, that Sync button would have a badge telling me there are changes I don’t have, that I might want to pull down.

That’s it for the basics! I can now continue making changes, commit, push, repeat. If this is all you’re after, you can stop here, but there’s much more we can do!
Get Involved
GitHub is all about collaboration. How can you get involved?
Open an Issue
You don’t need to code to get involved! Did you find a bug in a project on GitHub? Do you have a feature suggestion? A question?
Open an issue for the project. Browsing around GitHub, you might notice that most projects have an issues page!
Work on a Project
Start small. Consider minor bug fixes, documentation, and other minor changes to start; you want to build a relationship and trust with whomever maintains a project. Jumping in with a complete overhaul might not be the most tactful way to do this.
Fork a Project
Forking a project basically makes a copy that you can work on, separate from the project you fork.
I’ll fork a project from my real GitHub account, and clone it down to my PC to start working on it:
Once I fork the project, I can follow the previous notes on cloning, committing, and pushing. These will all affect my own fork of the project.
Now it’s time to give back!
Submit Pull Requests
I’ve made some changes to Wait-Path, committed them, and pushed the changes to GitHub. If I want to contribute to the original Wait-Path project, I can submit a Pull Request, asking to merge my changes into the original Wait-Path project.

Merge Pull Requests
Maybe someone has contributed to your project! On my ramblingcookiemonster account, I see that I have unread notifications, and can see the Wait-Path pull request from pscookiemonster:

Those changes look good to me, so let’s merge in the code:

Continuous Integration
When I opened the pull request, did you notice it turn orange and let me know it was waiting for the AppVeyor build to complete?
When I logged on as ramblingcookiemonster, I saw this:

A short while later, this changed:

Long story short, I’m using GitHub, Pester, and AppVeyor to enable version control, testing, and continuous integration for this project. Had my code failed the Pester tests, AppVeyor and GitHub would tell us that the build was broken.
Definitely check this out, it’s quite handy having AppVeyor automatically run my Pester tests, with a friendly heads up right in GitHub. Here are some posts on the topic:
- Fun with Github, Pester, and AppVeyor
- Github, Pester, and AppVeyor: Part Two
- Testing DSC Configurations with Pester and AppVeyor
- A PowerShell Module Release Pipeline
Etiquette
For all of these, follow the golden rule.
Would you want to receive an issue mentioning a bug, without details on how to reproduce the bug, whether troubleshooting steps were taken, and other important details?
Would you want to receive a pull request that changed hundreds of lines of code without explanation?
Staying up to Date
If you want to take a peak at what others are doing, consider following them, or their projects. This will pull interesting information into your front page feed on GitHub:

Interesting… What’s that? ScriptAnalyzer? Looks like Microsoft open sourced their Script Analyzer tool for PowerShell!
Next Steps
We’re seeing more and more PowerShell projects on GitHub, and with slick toolsets like GitHub, Pester, and AppVeyor, this is a great place to keep your code and collaborate with others. Who knows, CoreCLR is on GitHub, at some point, you might see PowerShell itself on GitHub.
Edits:
- Microsoft released the DSC Resources on GitHub. This means you can contribute, and receive the benefit from community contributions to DSC. They included a handy guide to contributing.
- At the 2015 PowerShell Summit, they announced that Pester will be included with Windows. This means folks like Dave Wyatt, Jakub Jareš, and Scott Muc will have contributed to Windows… Pretty cool!
Keep an eye out for myriad tools that can integrate with GitHub. Even something as simple as a Chrome plugin can help your workflow.
That’s about it; don’t be afraid to explore and try things out!
Disclaimer: Note the January 2014 date mentioned in the intro. That was the first time I had worked with Git. I am certainly not the most qualified person to be discussing this, just wanted to share my experience!
References
There are pages upon pages of references on Git, GitHub, and version control, not to mention books. Here are a few references:
- Contributing to Open Source on GitHub
- Good Resources for Learning Git and GitHub
- GitHub For Beginners: Don’t Get Scared, Get Started
- How To Win Friends And Make Pull Requests On GitHub
- Bitbucket - Bitbucket is a fantastic alternative to GitHub that plays well with both Git and Mercurial.
- Hg Init: A Mercurial tutorial - Git isn’t the only DVCS out there, Mercurial is a solid alternative, and IMHO is a bit easier to use in Windows.