

Overview
I recently published a quick bit on using GitHub, Pester, and AppVeyor, a slick combination to provide version control, unit testing, and continuous integration to your PowerShell projects.
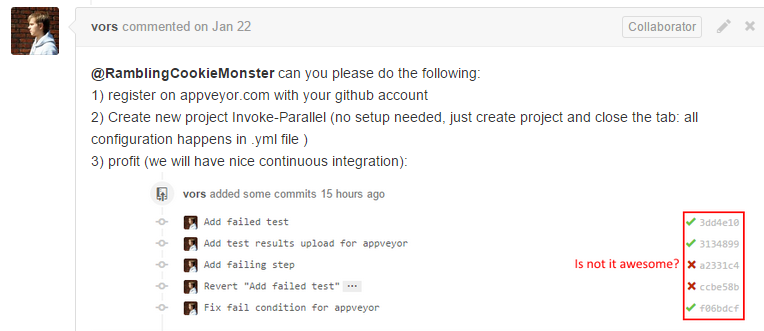
That post was a quick overview and essentially summed up ideas and implementation straight from Sergei. Before this pull request, I hadn’t worked with Pester or AppVeyor:
We just went through a major upgrade to our EMR, and I’m covering our primary admin for any fallout this morning. Thankfully, there wasn’t much to do, so I spent a few minutes toying with AppVeyor and Pester. This post is a quick summary of the outcome.
The code referenced in this post is now part of the PSDiskPart project on GitHub.
Abstraction
The AppVeyor yaml file used in the Wait-Path repository is fairly straightforward. It installs pester and runs a few lines of PowerShell. The readability for those PowerShell lines was a bit painful - no syntax highlighting, some shortcuts to keep code on one line, etc. My first step was to abstract most of the PowerShell out to another script.
The PSDiskPart AppVeyor yaml file is the result. It’s a little cleaner; the only test_script lines are calls to a single PowerShell script.
Not everyone would prefer this method, as it adds a layer of complexity, but I like the abstraction, and it enables the second line of PowerShell, where we call PowerShell.exe -version 2. So what’s in the appveyor.pester.ps1 controller script?
AppVeyor.Pester.ps1
My approach is to use a single file. Because we call it several times to cover both PowerShell version 2 and the native PowerShell version, we need to serialize our output and add a ‘finalize’ pass to collect everything and send it to AppVeyor.
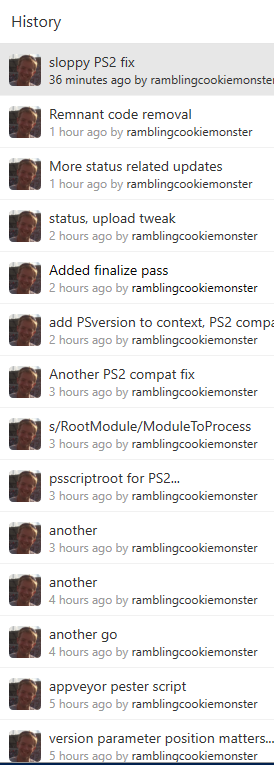
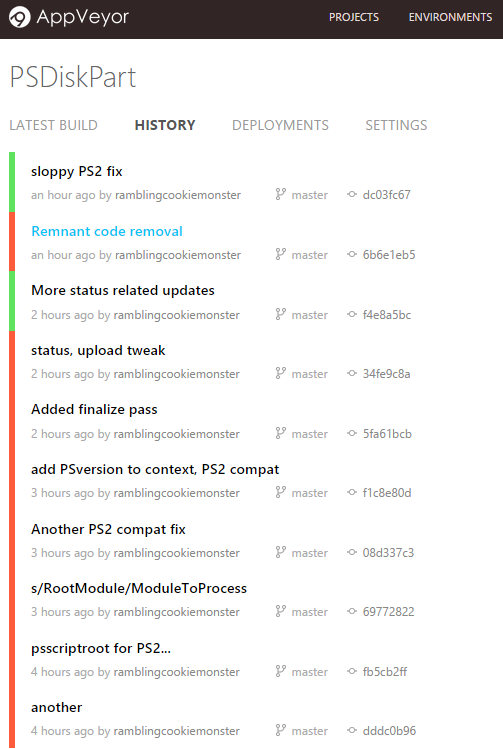
If you look at my commit or AppVeyor history for this morning, you will see an embarrassing number of small changes and tweaks – multitasking is generally a bad idea; multitasking without caffeine is worse:
The first of my struggles: relative paths. They’re great. But you need to start in the right path. You’ll note a reference to one of the AppVeyor environment variables, APPVEYOR_BUILD_FOLDER. This helped get me to the right path.
The second of my struggles: PowerShell.exe. I didn’t realize this, but if you place ExecutionPolicy and NoProfile parameters before -Version 2.0, PowerShell won’t be happy:

The third struggle: PowerShell 2 and PowerShell 3 are very different. At work, I always target PowerShell 2 and am all too familiar with the helpful language and functionality I must avoid. Throwing a PowerShell 2 iteration into the mix left me embarrassed at the number of PowerShell 3 assumptions I had made in the original PSDiskPart and Pester code!
- There is no auto module loading in PowerShell 2. We abstracted out the call to pester, so we need to add a line to import that module.
- Set-Loc
hits Set-LocalGroup before Set-Location. Okay, that’s not PS3, that’s me being sloppy! - In the module manifest, PowerShell 3 let’s us use RootModule. PowerShell 2 doesn’t recognize RootModule, so we switch to ModuleToProcess.
- PowerShell 2 did not include the $PSScriptRoot automatic variable.
- PowerShell 2 will loop over $null
- Get-Content -Raw was introduced in PowerShell 3
Walking through the build
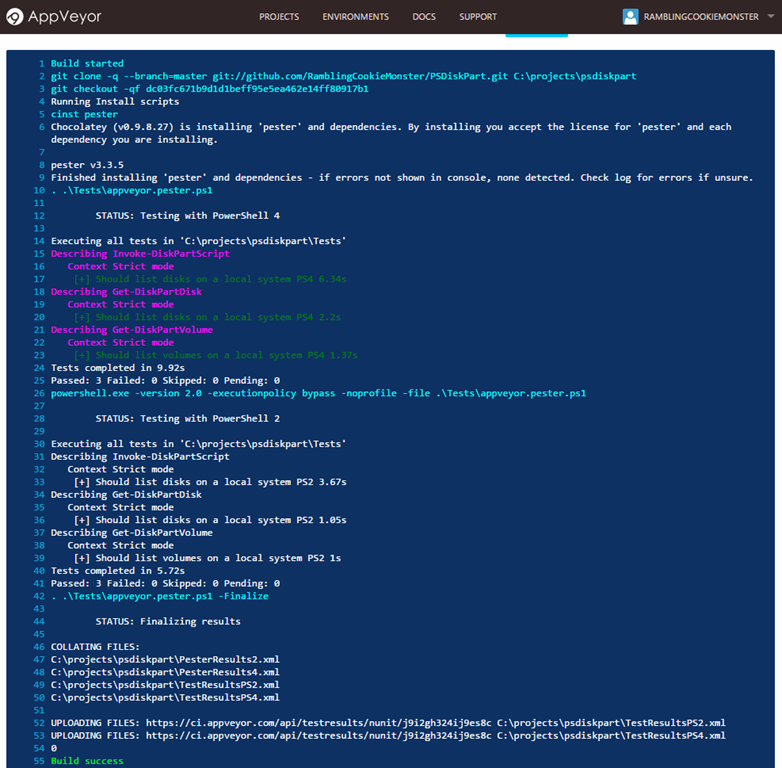
Here is the resulting passing build, we’ll step through the basic flow:
First, we ignore any commits that match updated readme:
# Skip on updates to the readme.
# We can force this by adding [skip ci] or [ci skip] anywhere in commit message
skip_commits:
  message: /updated readme.*/
Next, we run the first pass of appveyor.pester.ps1, which runs tests in the native PowerShell on the AppVeyor VM:
# Test with native PS version
  - ps: . .\Tests\appveyor.pester.ps1
This runs the AppVeyor testing controller script, which calls the PSDiskPart.Tests.ps1 Pester tests.
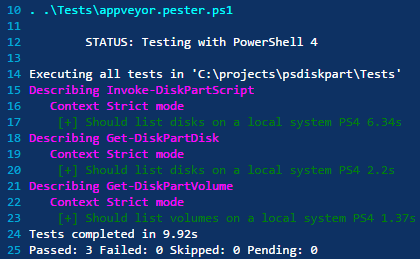
Success! Note that we differentiated the PowerShell version in the ‘It’ name. This would be more appropriate for Context, but we wanted to differentiate tests on the AppVeyor side:

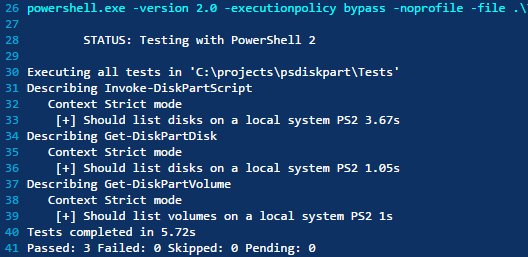
Next, we run this in PowerShell version 2 mode. Native AppVeyor support for this would be nice; as is, we don’t get colorized output without going through extra effort:
# Test with PS version 2
  - ps: powershell.exe -version 2.0 -executionpolicy bypass -noprofile -file .\Tests\appveyor.pester.ps1
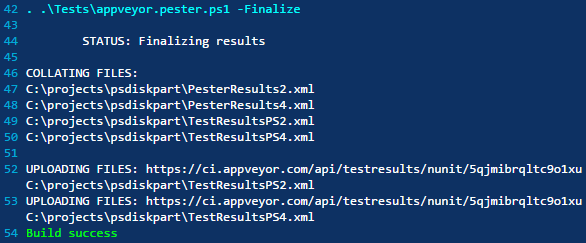
Finally, we want to collect all the results, send our tests to AppVeyor, and give some summary feedback if anything failed:
# Finalize pass - collect and upload results
  - ps: . .\Tests\appveyor.pester.ps1 -Finalize
The Outcome
Apart from working through my many mistakes, we now have our PowerShell abstracted out to a separate file we can view with syntax highlighting, we have a cleaner yaml file, and we have a simple way to test in both PowerShell version 2 mode, and with the native PowerShell.
We can focus on the domain-specific yaml in the yaml file, and PowerShell in the PowerShell file.
Badges
On a side note, I don’t think I mentioned badges in my previous post. In AppVeyor, browse to your project, view the settings, note the Badges section:
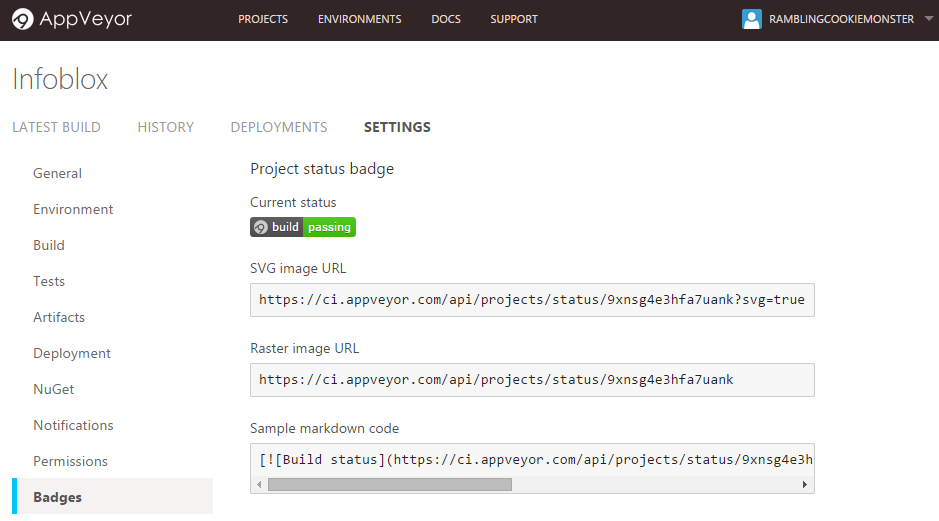
This is a great way to tell folks that your project is building successfully – or that it’s broken, as PSDiskPart was throughout the morning:
Next Steps
If you’re using GitHub for your PowerShell projects and haven’t checked them out yet, definitely consider looking into adding Pester and AppVeyor. If you already have your project in GitHub and your Pester tests laid out, adding them to AppVeyor only takes a moment (barring tests that require access to your internal environment). It took less than 30 seconds to add the InfoBlox module to AppVeyor once I had added a few example Pester tests.
On that note, consider test-driven development. Adding a comprehensive set of tests to a single function after it has been written is difficult. Covering an entire module would be painful. If you follow TDD and write your tests before you write the functionality that they test, you will be ahead of the game. As you can tell by my contributions, I am certainly not there yet, but I like the idea.
There’s a lot more to explore in AppVeyor. As far as I can tell, it looks like it can be used to help enable both continuous integration and continuous delivery. Poke around, experiment, and if you find anything helpful, share it with the community!
Edit: A few related posts:
- GitHub for PowerShell Projects - The basics
- Fun with GitHub, Pester, and AppVeyor - Intro to the toolset
- Github, Pester, and AppVeyor: Part 2 - You are here
- Testing DSC Configurations with Pester and AppVeyor - Quick integration testing for DSC resources and configurations